Automatically have your Ruby call, message, and voicemail data sent to your MyCase account, making it easy to associate client communication with specific cases and contacts. You’ll save time and get more done with all your clients’ details in one place!
For HIPAA Compliant Customers: This integration does not meet the necessary communication security requirements for Protected Health Information and therefore should not be used in conjunction with HIPAA compliant Ruby service.
Begin Setup
STEP 1: Log in to your Ruby account at my.call-ruby.com.
STEP 2: Navigate to the Account section from the left sidebar, and then click Integrations.
STEP 3: Click “Add New” and choose MyCase from the list of Integration options section, and click Connect to open up your MyCase account and sign in.
STEP 4: Left click on the meatball menu and select “Enable Automatic Transfers”. This will set up your account to have all incoming activity flow into your MyCase logs. If you'd prefer to not have all activity flow through, left click the meatball menu again and click “Modify Rules”.
Your MyCase Call Log
Under the Communications tab in MyCase, notifications from Ruby will display in the Call Log. Your calls will always be listed from the “Ruby Integration,” making it easy to find those messages.

The caller ID information will be displayed in the Caller column, and you can view all the details the receptionist gathered from the caller in the Message column.
In the Caller column, click the Add/Link Caller button to either create a new MyCase contact from the call, or associate the call with an existing contact.

You can also add a time entry, add a task, or edit a call log using the buttons on the right.

Create a Contact Form
Take advantage of MyCase’s contact form feature and allow Ruby to collect information and submit it directly to your MyCase account. To set up a form the our receptionists can use:
STEP 1: In your MyCase account, navigate to Settings and then Intake Forms in the left side menu.
STEP 2: Your Contact Form is pre-built into your account and will appear at the top of your list of intake forms. Click the edit icon in the top right corner to update the name and fields of the form.

STEP 3: Customize your form to include the intake information you’d like us to gather from callers. We recommend including Name, Email, Phone, and any other questions specific to your practice.
TIP! You can learn more about setting up a contact form here.
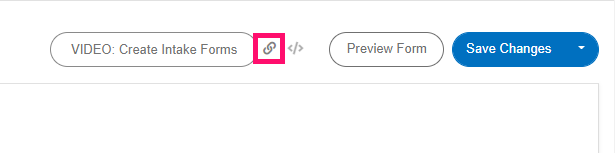
STEP 4: Click Save Changes and then click on the link icon to copy your form link to your clipboard.
STEP 5: Send your link to the Customer Happiness team to be incorporated into your call-handling instructions for potential new clients! Every time our receptionists take a call from a new lead, we'll fill out your contact form and the caller's information will be synced directly to your account.
NOTE: Your firm will still need to approve the lead by clicking on the Online Lead section in MyCase and then clicking Approve. Then, the lead will officially show up on the Lead Status page.