You can set Ruby up on your Grasshopper account in a few different ways for maximum flexibility! Learn how to forward your caller ID information to Ruby and choose the best forwarding method for you below.
Forward Caller ID Information
To ensure you have access to all Ruby features like call blocking and Ruby Contacts, it is best practice to ensure Caller ID information is being forwarded to Ruby along with your calls.
- Sign into your Grasshopper account.
- Navigate to Extensions and select Edit next to your Ruby extension (ext 799).
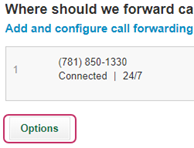
- Under the forwarding numbers, click Options.
- Click the dropdown menu next to "When a call is forwarded to me, show the caller ID of,” and select The caller.
- Click Save.
Forwarding Options
For assistance setting up any of these forwarding options, contact the Grasshopper Care team at 800-820-8210!
Bypass the main greeting/auto-attendant & forward directly to Ruby. Have Ruby answer all of your incoming calls so that you can focus on your work.
- Sign into your Grasshopper account.
- Navigate to Settings > Numbers.
- Next to your Grasshopper number, select Transfer to extension. An extension number dropdown menu will populate.
- Select your 799-Ruby extension. (Forwarding may take up to 5 minutes to go into effect.)
- Next, navigate to Extensions and select Edit next to your Ruby extension.
- Select Edit again next to Call Forwarding.
- Under “How should Grasshopper handle calls to this number?” select Calls will connect to you as soon as you pick up.
- Select Save & Close then then Close to save the changes.
Find more information on setting up direct forwarding in Grasshopper's support center here.
Add a Schedule:
If you would only like calls to forward to Ruby during certain hours (during your office hours, for example) and go to your Grasshopper voicemail all other times, you can add a schedule.
- Go to the Extensions tab and find extension 799 – Ruby. Click Edit.
- Update the “When do you want this number to receive calls field?”

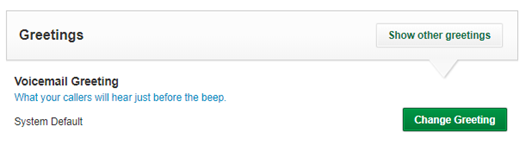
- Check to ensure your Grasshopper voicemail is configured in the extension and set to “System Default.”
- Click Save & Close next to where you added the forwarding number.
- Next, click the Options found directly below the forwarding number you added.
- On this screen, you’ll choose the following options:
- This extension should call each of my phone numbers: in order, just once
- When a call is forwarded to me, show the caller ID of: the caller
- Before being forwarded, let the caller hear: a ringing tone
- Click Save to save these settings.
Delayed call forwarding. Let Ruby take over when your hands are full! Calls will ring to your office first, and then roll over to Ruby if you’re not free to answer.
- Sign into your Grasshopper account.
- Go to the Extensions tab, and find extension 799 – Ruby.
- Click on View Details to name the extension “Try [Office/Name] first, then Ruby.”
- Next, configure the first number by selecting Add a forwarding number.
- Forwarding Number field: Add the number the call will ring to first.
- Ring for…: Change this to 15 seconds. (Ignore any warnings that pop up.)
- How should Grasshopper handle calls to this number?: Choose “Calls will connect to you as soon as you pick up.”
- Description: Add a description like, “Try [Office/Name] first.”
- Click the Save & Close button where you added the forwarding number.
- In that same extension, under the forwarding number you’ve already added, click on Add a forwarding number.

- Configure the second number.
- Forwarding Number field: Add the number the call will ring to Second (This will be your Ruby forwarding number).
- How should Grasshopper handle calls to this number?: Choose “Calls will connect to you as soon as you pick up.”
- Description: Add info like, “Roll over to Ruby after trying [Office/Name]”
- Click Save & Close.
- Next, click Options.
- On this screen, you’ll choose the following options:
- This extension should call each of my phone numbers: in order, just once
- When a call is forwarded to me, show the caller ID of: the caller
- Before being forwarded, let the caller hear: a ringing tone
- Click Save to save these settings.
If you would like calls to your published number to roll over to Ruby without using an auto-attendant, you’ll take two additional steps: - Go to the Settings > Numbers tab.
- Find the forwarding number and choose, Transfer to extension. Then select the extension 799 – Ruby you just created with the delayed forward.
Use Ruby as an option in your auto-attendant. We don’t always recommend this option, as callers can often get lost in phone trees and hang up! Ruby can also route different types of callers according to your preference, making most auto-attendants unnecessary. However, if you would like to continue using an auto-attendant and only route certain extension(s) to Ruby (i.e. only forward callers who press 1 for new inquiries), follow the steps below:
- Click on the Extensions tab.
- Locate the existing extension you’d like Ruby to answer.
- Click Edit to configure the extension.
- Forwarding Number field: Add your Ruby forwarding number. (If you’re not sure what your Ruby forwarding number is, you can find it in the same Forwarding Number field in your 799-Ruby extension.)
- How should Grasshopper handle calls to this number?: Choose “Calls will connect to you as soon as you pick up.”
- Description: Add description like, “Forward to Ruby 24/7.”
- Select Save & Close.
Follow these steps for all extensions you’d like to ring to Ruby. For example, if you want Ruby to handle billing calls (extension 3), customer service calls (extension 4), and be the miscellaneous extension (extension 0), all extensions would need to be updated to ring to Ruby using these steps.
If you’d like to re-record your auto attendant greeting:
- Navigate to the Settings > Main Greetings tab.
- Click Change Greeting.

- Click Create New Greeting and choose how you’ll record your greeting.
- In the same main greeting settings, under Options:
- If there’s no input after the main greeting plays field: Choose “transfer to an extension.”
- Choose the appropriate extension that rings to Ruby.

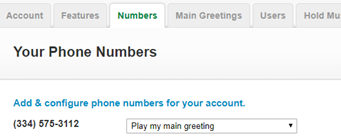
- On the Settings > Numbers tab, ensure that “Play my main greeting” is selected next to the published number.
Find more information on configuring extensions in Grasshopper's support center here. The Grasshopper Care Team is also available to assist at 800-820-8210.